Find Your Affiliate Links
Linking to our homepage or using your default affiliate link usually is not enough. Your audience is looking for specific products for their business needs and the best way for you to meet those needs is to share relevant HubSpot landing pages, exclusively created for the affiliate program. Here's how to find your links to them:
-
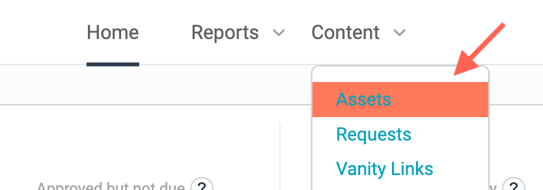
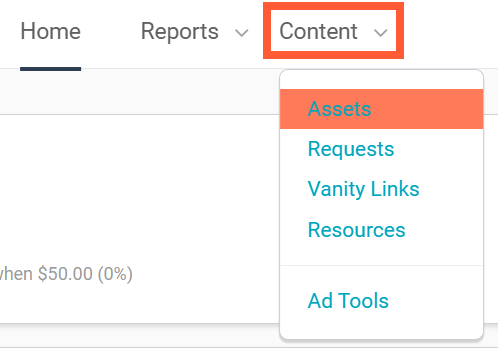
Log in to your Impact account and go to the top navigation bar. Click on “Content”, then “Assets".
-
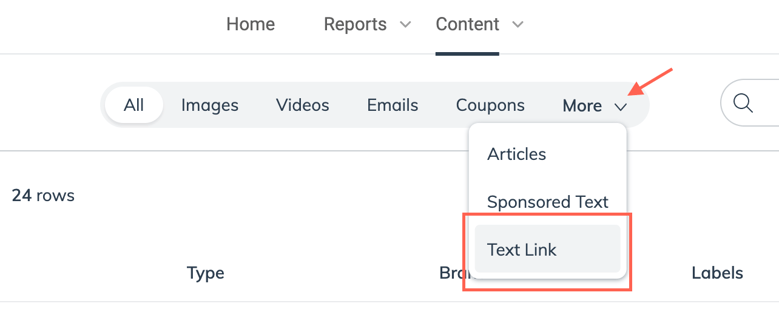
Filter by "Text Link". If you’re part of multiple programs on Impact, make sure to add an additional filter for the Brand “HubSpot".
-
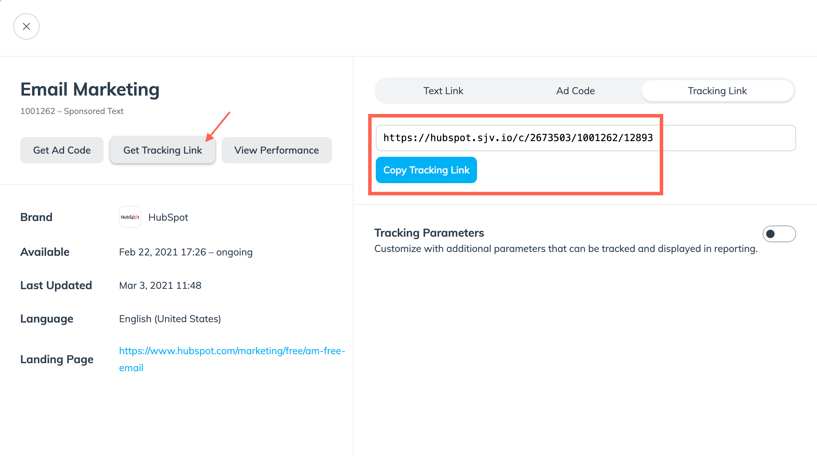
Click on the link corresponding to the product you want to promote, then click on “Get Tracking Link".

Create Your Own Links
Can’t find the page you’re looking for? Create your own link!
-
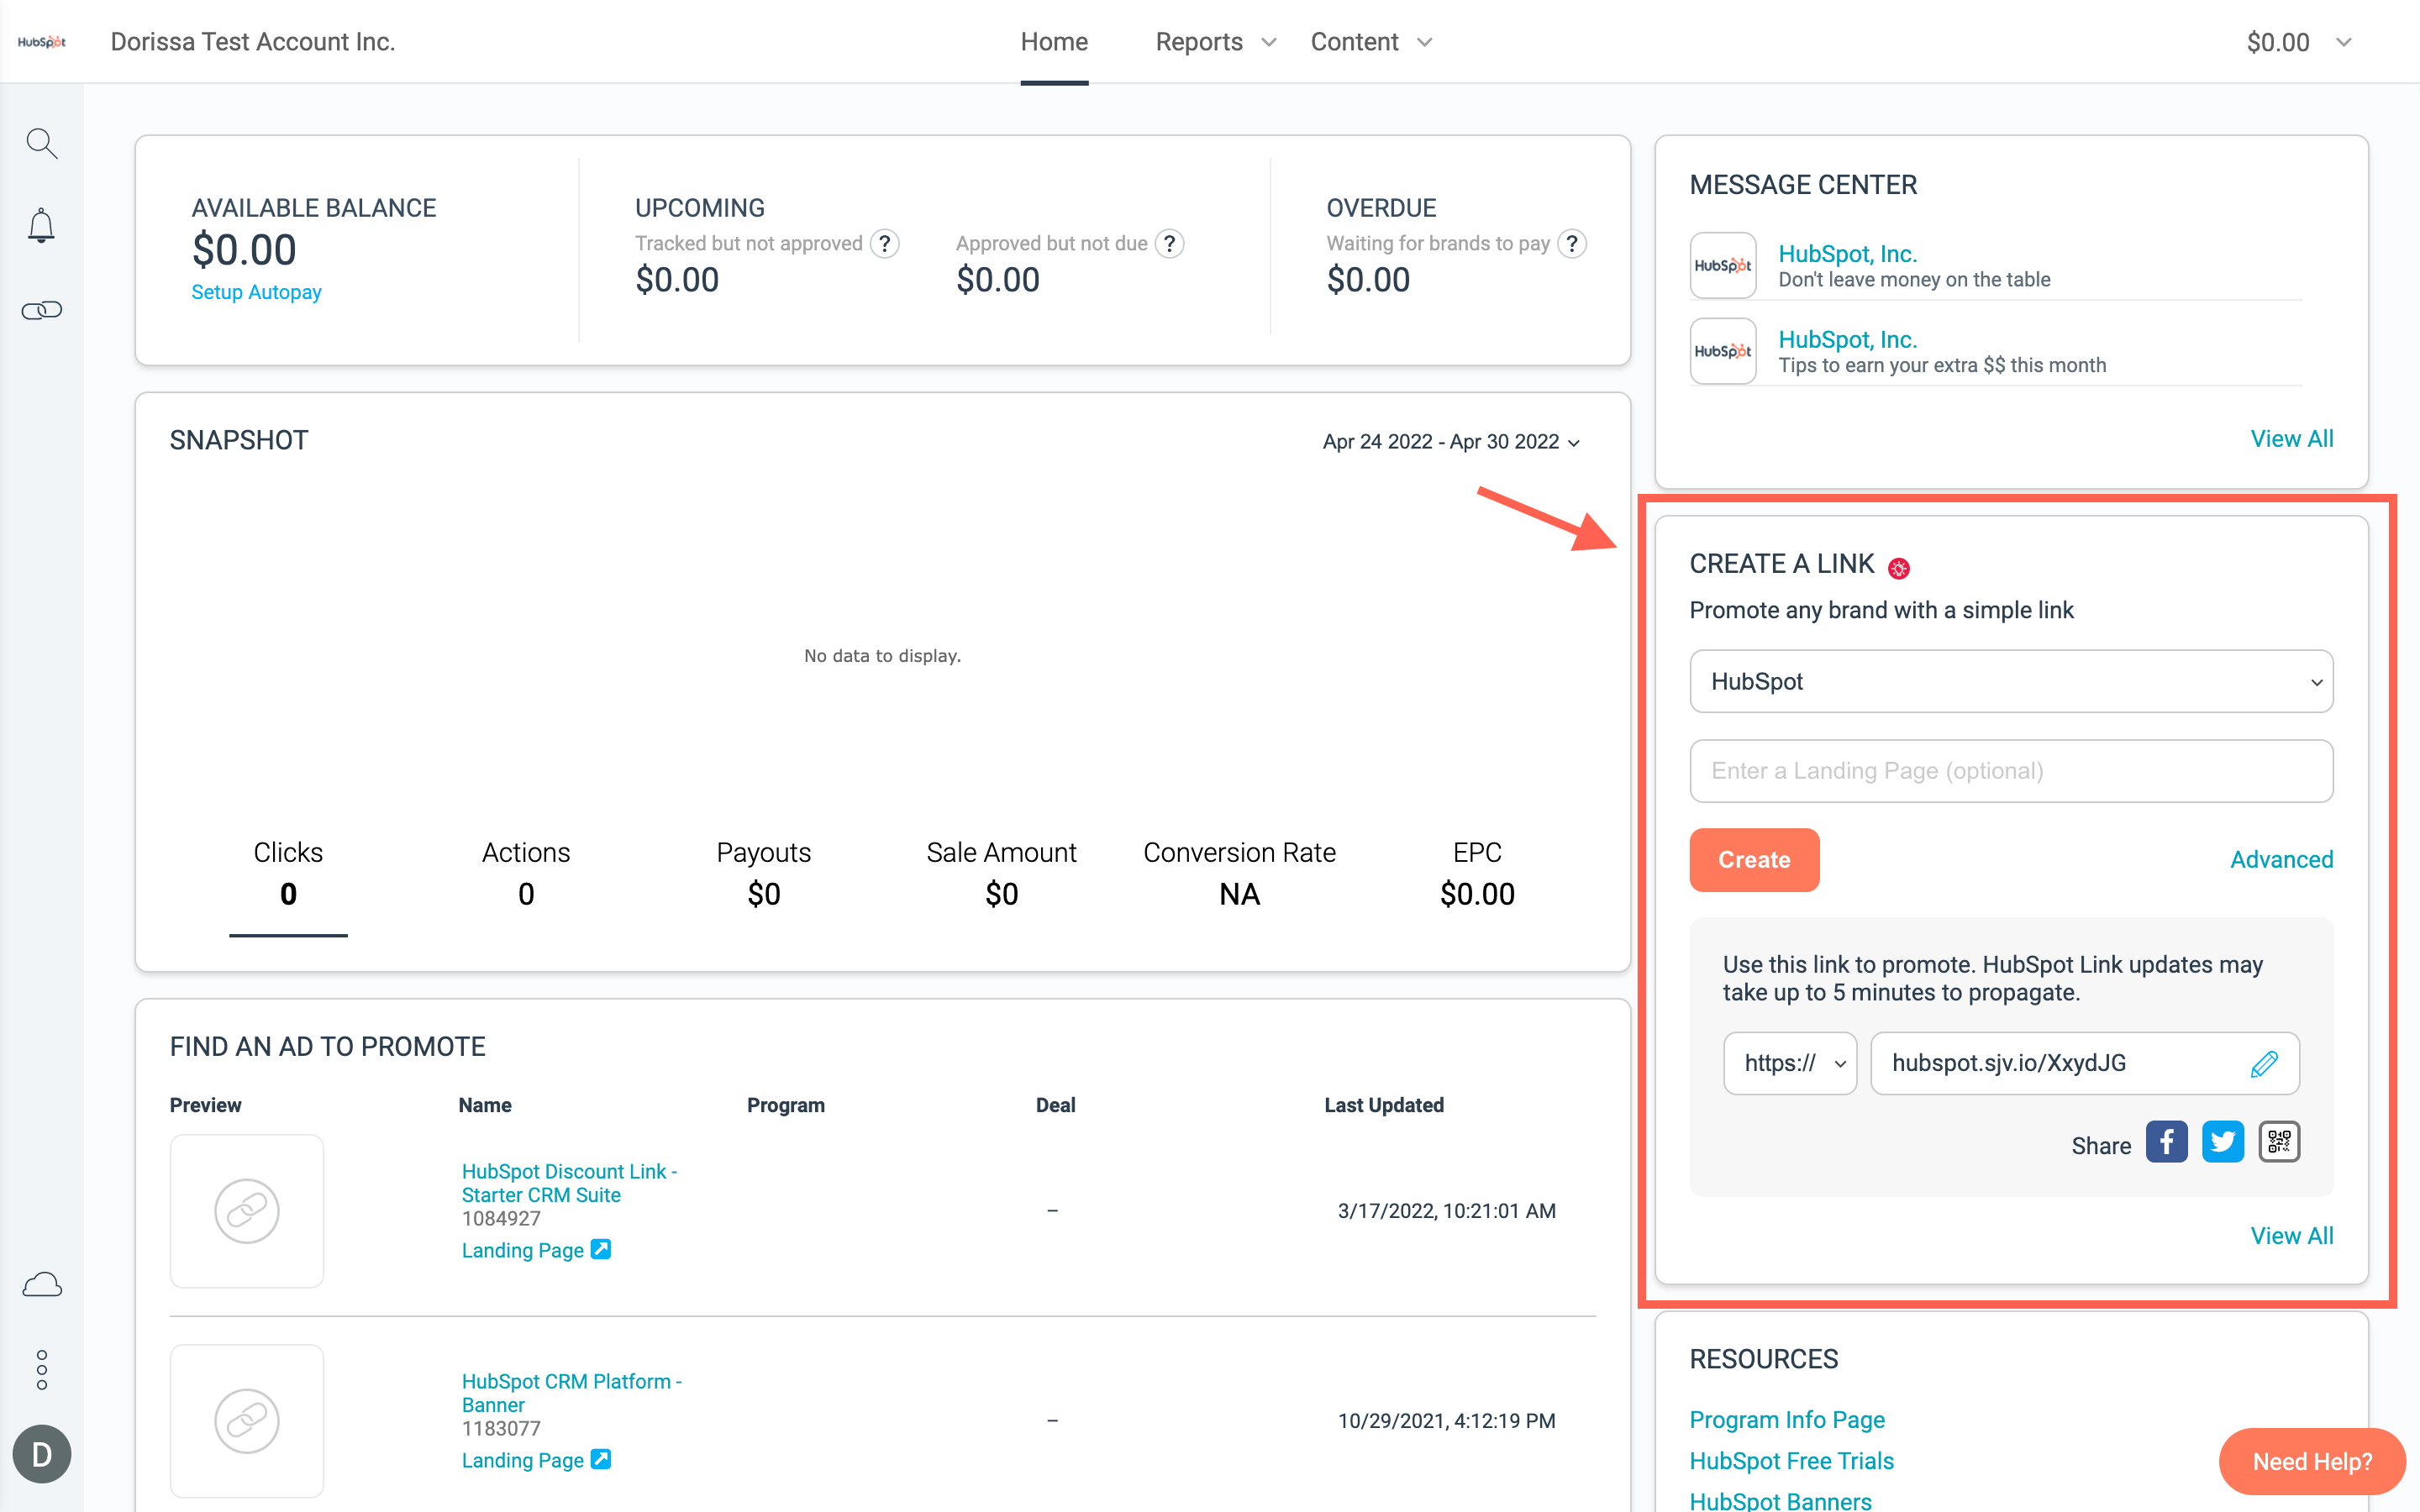
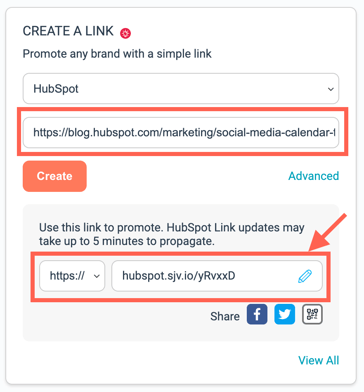
Go to your home page and go to the “Create a link” section on the right hand side of the screen. Make sure “HubSpot” is the selected brand.
-
Type or paste the URL you wish to create a link for. Make sure it has "https://" in front of it or the link won’t work.
-
Click “Create” and copy your link.
-
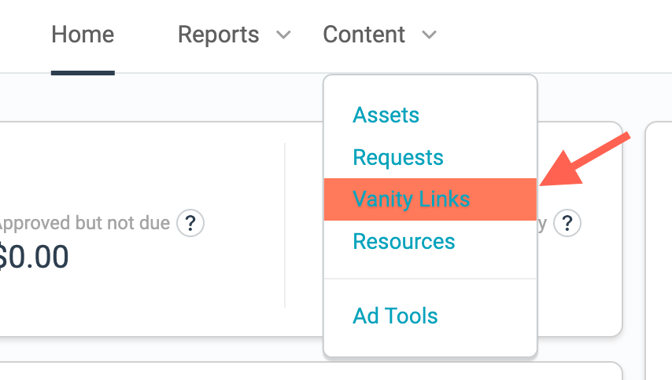
To go back and find all the links you’ve created, simply go to “Vanity Links” in the top navigation under “Content”.
Customize Your Tracking Links (Sub IDs & Shared IDs)
Tracking links can be customized with additional parameters which are tracked by and reported to Impact. These parameters are called Sub IDs and Shared IDs. They enhance your data so you can get a clearer picture of what links convert best.
- To add these parameters to a tracking link, click on the “Content” tab from the main navigation menu. Select “Assets” from the drop down menu.
-
Select the asset that you want to add these parameters to.
-
Click the “Tracking Link” tab on the top right, then toggle on “Tracking Parameters”.
-
Fill out the fields to add the Sub ID and Shared ID values.
- Sub ID values passed via the tracking link are only visible to you in your reports, while a Shared ID is visible to both you and HubSpot (or whatever brand you’re working with).
-
Click the “Save” button at the bottom. Then, a new affiliate link will generate that includes the parameters you added (see example below).
- Affiliate link before adding a Sub ID or Shared ID: https://hubspot.sjv.io/c/3582223/1001257/12893
- Affiliate link after adding a Sub ID and Shared ID: https://hubspot.sjv.io/c/3582223/1001257/12893?subId1=test&sharedid=test

You can also view the Performance by Sub ID report (which includes Shared ID performance) to see how well your customized tracking links are doing. This report can be found under Reports → All Reports → Performance → Performance by Sub ID. Learn more about Sub ID and Shared ID Parameters in this helpful article.
Banner Images and Other Creative Assets
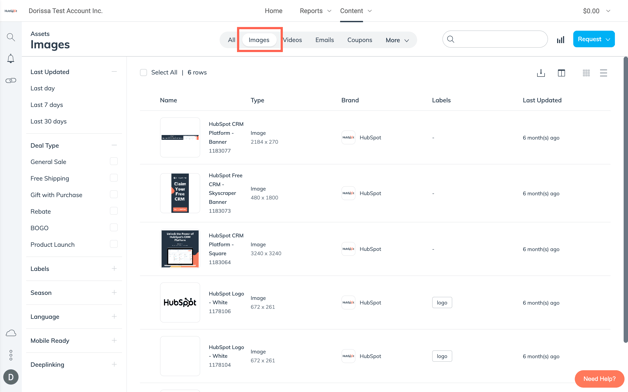
Links are not the only thing you can find on Impact. Get instant access to banners when you filter assets by images:
-
Just like with your affiliate links, navigate to the top navigation bar. Click on “Content”, then select “Assets" from the drop down menu. Make sure to filter Brands for "HubSpot".
-
Filter by Images to find logos and banners.
See How Much Money You’ve Earned
Wondering how much your hard work is paying off? You can easily check your current account balance at any time. The quickest way to see how much money you’ve earned is on the home page. From the home page view, click on the “Total pending” and “Balance” figures to see a more detailed report on each.
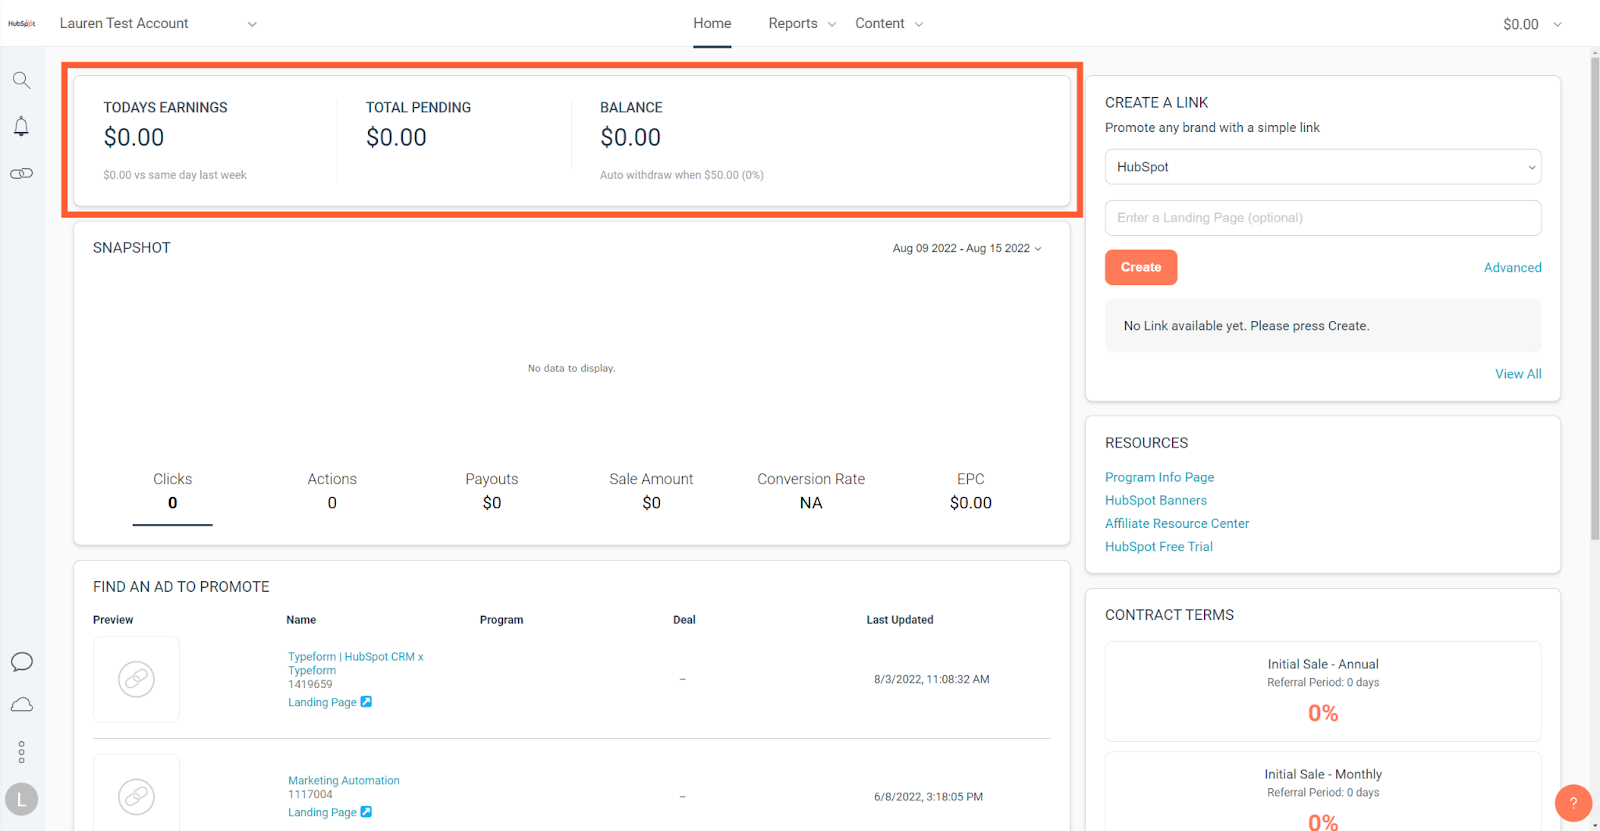
Another way to view your current account balance is in the top right hand corner. You can access the details of your account balance and more by clicking on the drop down menu. Here you can view details on your account balance, pending amount, earnings history, invoices, and pending actions.

When we run a promotion, we may offer you bonuses in addition to your commission payouts. If you want to know how much you’ve earned in bonuses separate from your commission payouts, you can do so by viewing your performance reports.
Your bonuses will show up in Impact as "Other Cost" (or sometimes "Other Earnings") in both your Performance reports (by Brand, by Month, by Day, etc.) and Finance Earnings reports.
-
To see your bonus earnings, click the “Reports” tab in the main navigation menu. Click “All Reports” from the drop down menu.
-
Scroll down to the “Finance” section of reports and click “Monthly Earnings”.
-
In the “Monthly Earnings” you can see the “Other Earnings” column which represents your bonus amounts separate from your commission earnings.


For more information about performance reports, click here.
Set Up Your Bank Account & Withdraw Your Balance
If you haven’t already, complete your bank account settings to ensure you can withdraw your earnings when that time comes.
-
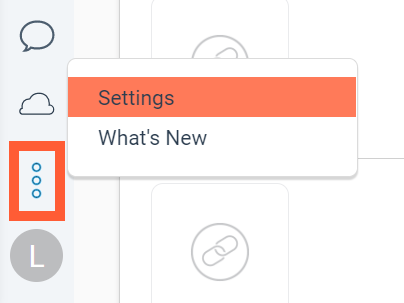
Log in to your Impact account and click on the three dot icon at the bottom left corner of the home page. Click the “Settings” tab.
-
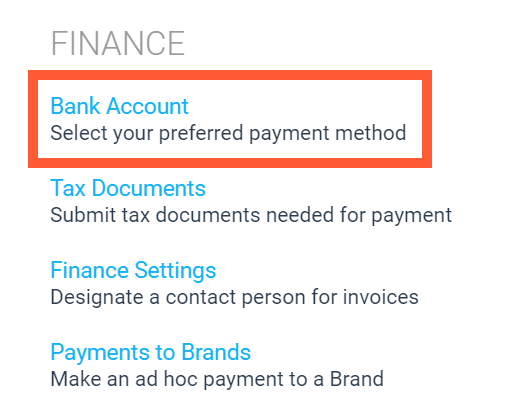
Scroll down to the bottom of the account settings page to see your “Finance” settings. Click on “Bank Account” settings.
-
You have two payment method options and two autopay options to choose from:
Payment Method Options:
-
Electronic Funds Transfer (EFT): Select this option if you want to transfer your Impact account earnings to an eligible bank account through direct deposit.
-
PayPal: Select this option if you want to receive your Impact account earnings via your PayPal account. Keep in mind that this option adds a 2% processing fee capped at $20 USD.
Autopay Options:
-
Balance Threshold: Select this option if you want to withdraw the balance in from your Impact account after it reaches a specified amount.
-
If your account balance is above the chosen threshold, the withdrawal will begin processing, sending the funds to your chosen destination.
-
If your account balance is below your minimum balance threshold, funds will not leave your account.
-
-
Fixed Day: Select this option if you want to withdraw funds from your Impact account on either the 1st or the 15th (not both) of a given month. The withdrawal will begin on the day chosen, and if the chosen date lands on a weekend or bank holiday, the withdrawal will begin on the next business day.
- You must have at least $10 USD (or your currency equivalent) for a Fixed Day withdrawal to initiate, though you can raise this threshold during setup.
- This withdrawal option is not recommended if you are partnered with more than one brand. If any brands fund their account after your chosen day, you will need to wait until the following month to receive your payout.
-
- Once you select your payment method and type of autopay, click the "Save" button to complete setting up your bank account settings.

Change Your Account Currency
Wondering how you can change your account currency? Unfortunately, you can’t change your currency once your impact.com account is set up. If you want to change the currency of your account, you must set up a new account with the desired currency. To do so, follow these steps.
Understand Your Contract Terms
It’s important to understand how your earnings are calculated based on your contract terms to help you set goals and optimize your promotional efforts. What do your contract terms exactly mean? Here is a detailed explanation of how you can interpret your contract terms. How do you access your HubSpot contract terms? Here’s how you can find your contract terms whether you’re partnered with only HubSpot or with multiple brands:
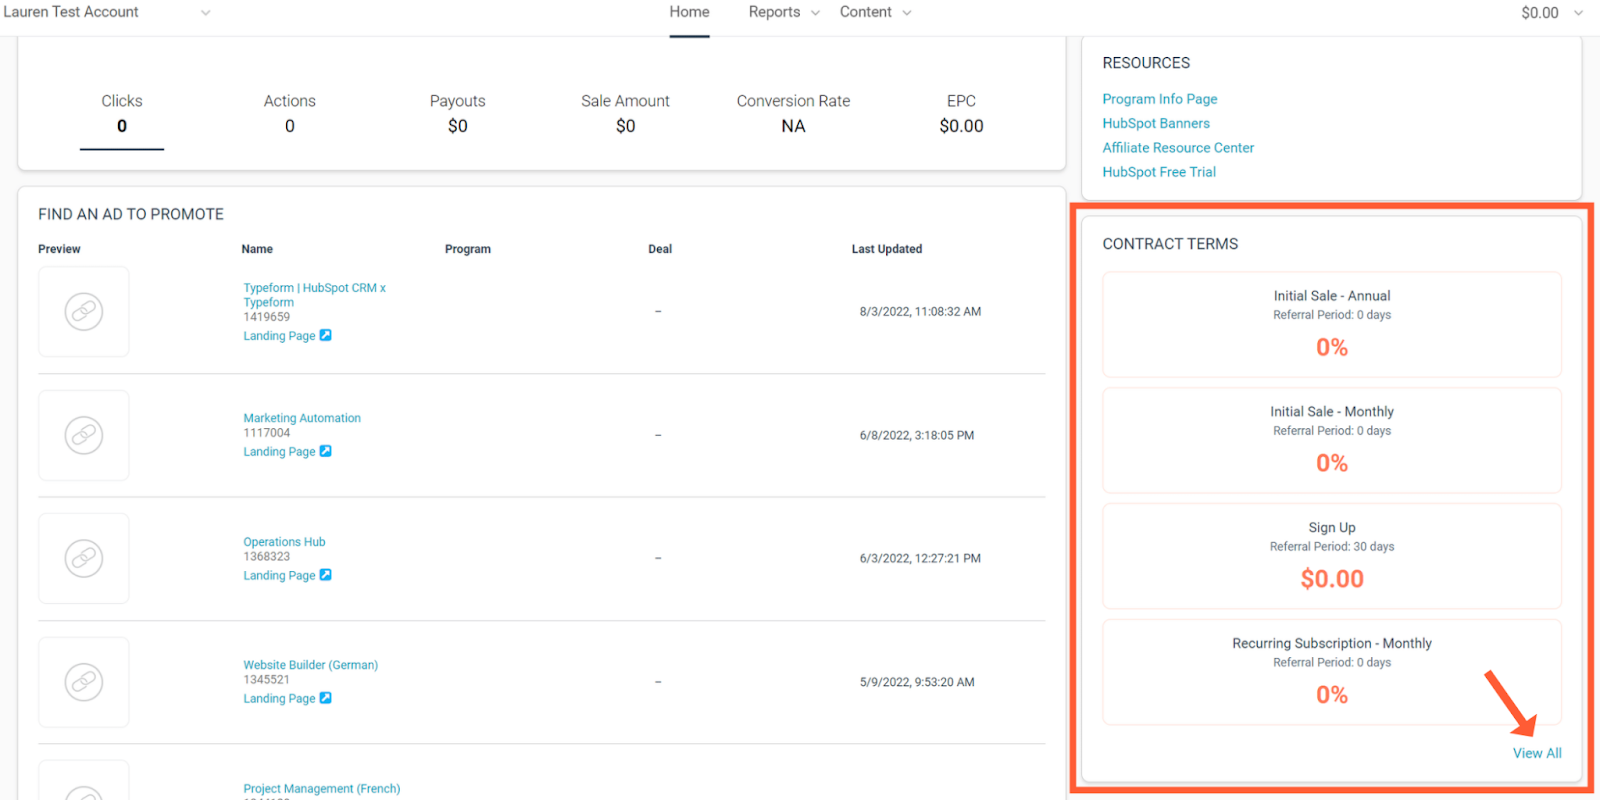
If you’re partnered with HubSpot only: To view your contract terms, log in to your Impact account and locate the “Contract Terms” box on the lower right of the home page. Then, click the “View All” button.
If you're partnered with multiple brands:
-
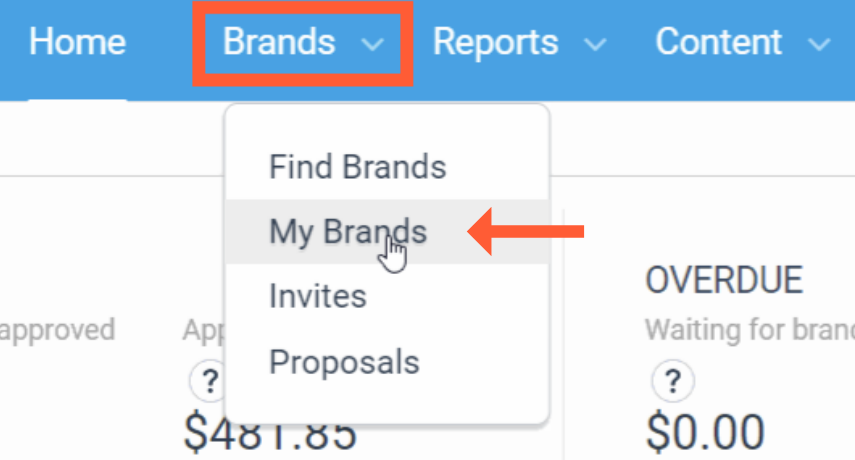
To view your contract terms, log in to your Impact account and click the “Brands” tab in the main navigation menu, and then click “My Brands”.
-
Click on “HubSpot” (which is represented by “Demo Campaign” in the image below). Then, click the “More” drop down menu and select “View and Manage Contract”.

Additional Information
Bank account settings: For more details on how to complete your bank account settings, check out this helpful article.
Tax documents: In addition to your bank account settings, you need to complete your tax documents to ensure smooth account balance withdrawal. Haven’t done this yet? Click here to learn more on how to submit your tax form.
Delayed payouts: Wondering why you haven’t received your payouts yet? This article will help you determine when you can expect your payouts.
Performance Snapshot
The snapshot widget on the home page shows your account performance over a customizable date range. If you’re partnered with only HubSpot, this snapshot widget shows your overall performance with HubSpot. If you work with multiple brands, this widget shows a snapshot of your total performance across all brands. Want to compare your brands’ individual performance? Go to the Performance by Program report.

-
To change the date range of the displayed data, click on the date range in the top right corner of the widget.
-
To see a specific performance metric appear in the line graph, click on any one of the metrics (Clicks, Actions, Payouts, Sale Amount, Conversion Rate, EPC).
-
Hover over any dot in the line graph to see the total recorded amount of the selected metric for that day.
-
To view the more detailed Overview report, click on “Snapshot” in the top left corner of the widget.
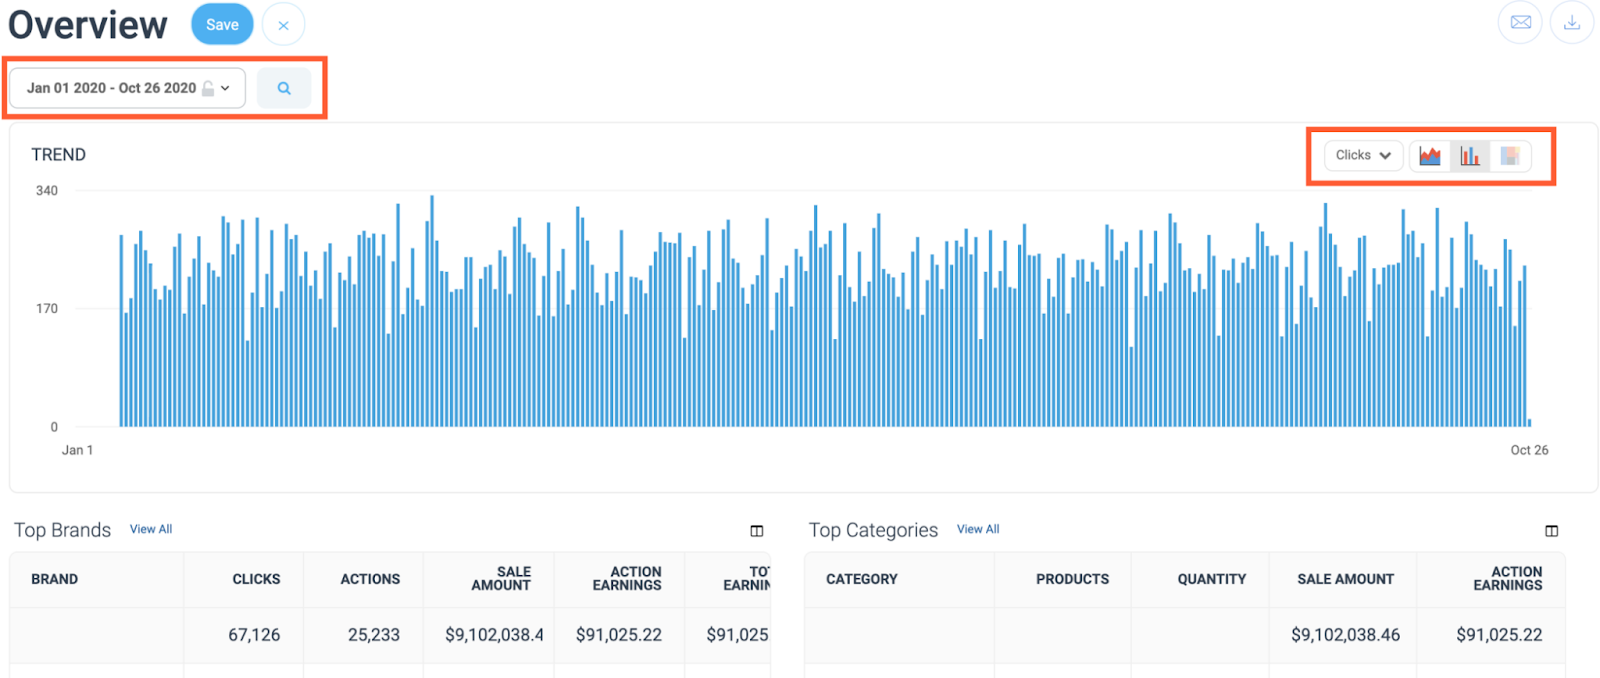
Performance Overview
The Overview report shows you a wide range of tracking data and condensed reports, like your Top Brands, Performance by Day, and Top Promo Codes reports.
-
To access this report along with other performance reports, click on the “Reports” tab in the main navigation menu. Then, from the drop down menu, click on “Overview”.
-
You can filter for the date period you want to view. Click the Search icon when you have the filters you want in place.
-
In the top right corner of the graph, you can customize how and what data is presented for the date period chosen. Click on the drop down menu to select what data is presented.
- Below the graph, you can see snapshots of some reports including your Top Brands and Performance by Month reports. Check out this article for a detailed reports reference.

All Reports
Tracking your performance is essential to your success, and fortunately, you have tools that do just that! Use reports to determine if you're meeting your goals and to understand what’s working (and not working). To access these reports, click on the “Reports” tab in the main navigation menu, then select “All Reports” from the drop down menu. Learn more about all the reports available to you in this informative article.
Customize Reports
Looking for something specific in your reports? You can customize reports to show only the data you want to see.
-
Select the date range of the data you want to display.
-
Choose the program(s) you want to view.
-
Select the metrics you want to display.
-
For reports with a trend graph view, click the drop down menu within the trend graph to change the graph metric from the available options.
-
For reports with a trend graph view, select one of the Graph icons to switch between a line graph, bar graph, or square pie chart.
Save Reports
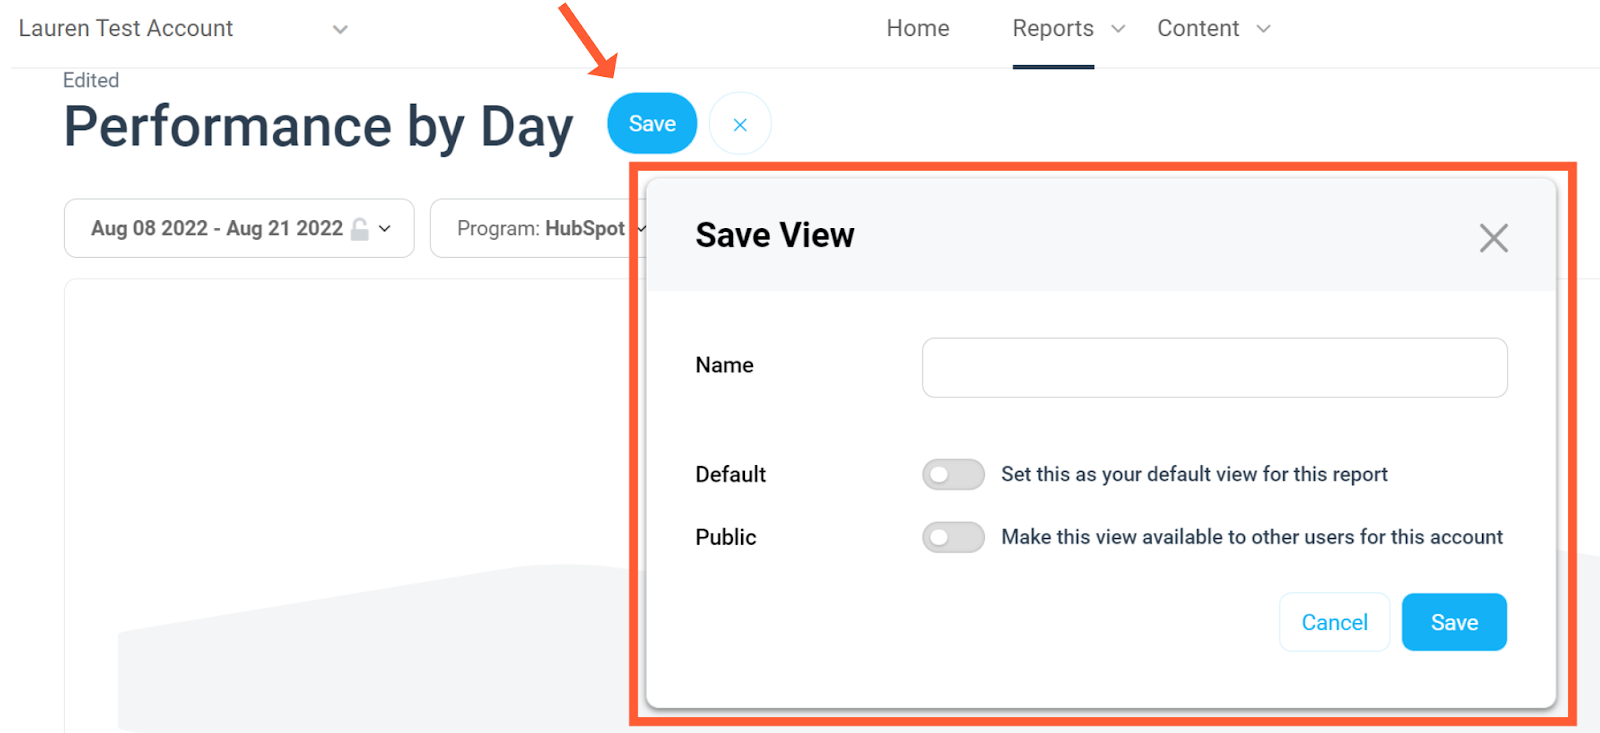
When viewing a report, you can make any number of changes to it and save that specific view of that report.
-
Once you've made the desired changes to your report, save this view by clicking the “Save” button.
-
Name this view and complete the settings for the report.
-
Click the “Save” button in the dialog box located at the bottom right of the box.
-
To access this view of this report, click on the “Reports” tab in the main navigation menu. Then, click on “Saved Reports” in the drop down menu.

For more guidance on saving and accessing your customized reports, check out this article.
Schedule Reports
Want to share reports with your team or automate the process of checking your performance? Schedule reports to be sent on a one-time or recurring basis via email or Partner FTP.
-
Click the “Reports” tab in the main navigation menu, then click “All Reports” in the drop down menu.
-
Select the report you want to schedule.
-
Within the report view on the top right corner, click the Mail icon.
-
Set the settings of the report in the dialog box. Click the “Schedule and Send” button to finalize this action.


For more information on scheduling reports, read this article.
Help & Support
Trouble Logging In / Password Reset
Get Support: Help Docs & Support Tickets
Trouble Logging In / Password Reset
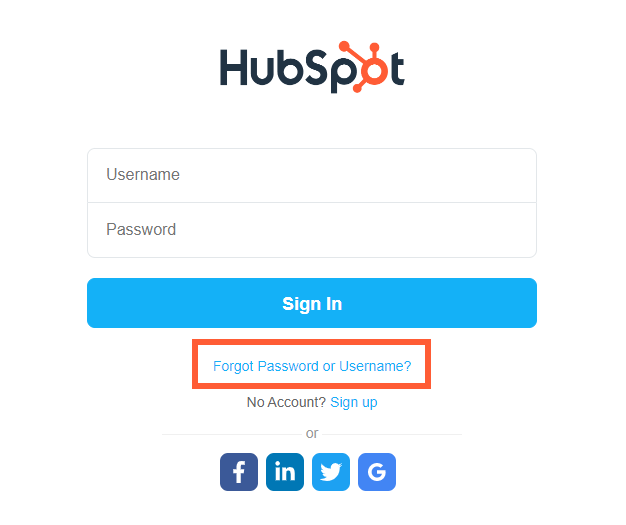
Having trouble logging in to your impact.com account or forgot your password? You can reset your password by following these steps:
-
Click here to visit the impact.com login page.
-
Click on the “Forgot Password or Username?” link.
-
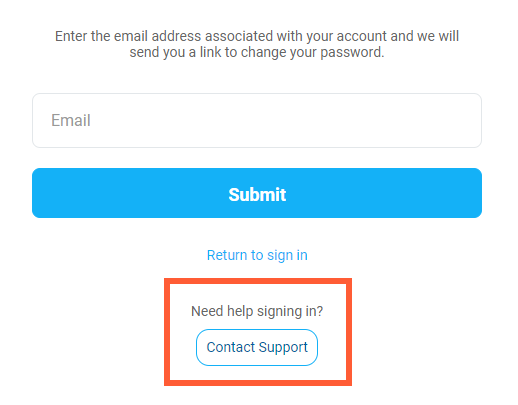
You will then be prompted to enter the email address associated with your account.
-
Impact.com will send you a link via email to change your password. Be sure to check your spam folder as the email may land there instead of your main inbox.
If you are still unable to log in, you can click the Contact Support button. Then, fill in the form and the impact.com support team will assist you.
Get Support: Help Docs & Support Tickets
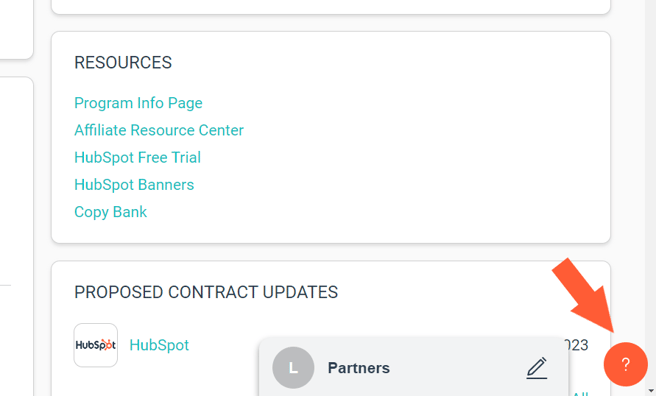
If you ever need help with the impact.com platform, simply select the question mark button from the bottom right corner of your screen to access the Need Help Menu.
This menu links to help docs, support tickets, live chat, and platform walkthroughs.
Help Docs
If you have questions related to the impact.com platform, they may already have your questions answered in one of their help docs.
-
Select Help Docs from the Need Help Menu to view help articles.
-
You can easily search by keyword or phrase, or navigate via the categories.

Support Tickets
Want to directly contact the impact.com support team? Create a ticket!
-
Select Tickets located on the Need Help Menu.
-png.png?width=595&height=450&name=image-Feb-24-2023-09-26-23-6373-PM%20(1)-png.png)
-
From the Tickets dashboard, select Create Ticket from the top right of your screen.

-
After you get an email notifying you of an update to your ticket, you can come back to Tickets to respond.
To learn more about Tickets, read this article.